
Septic System Installation Guide
Advanced Enviro-Septic® and EnviroFin® technologies are powerful wastewater treatment solutions that remove up to 99% of all contaminants from effluent. They require minimal assembly, configuration, and maintenance, making them ideal septic solutions for residential and commercial projects. But they are also both customizable and scalable, allowing you to work with difficult terrain or large-flow needs at the municipal level.
 The following septic system installation tips are designed to help you get familiar with installation of the basic Advanced Enviro-Septic®and EnviroFin® system components so you can get the most out of these environmentally friendly septic treatment technologies.
Click here for a step-by-step video series on installing the EnviroFin® septic system.
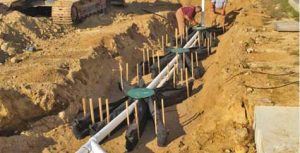
1. Pipe Connection Couplings
A coupling is a plastic fitting used to create a connection between two pieces of Presby Pipe. Note that the couplings are wide enough to cover 1 or 2 pipe corrugations on each of the two pipe ends being joined. The couplings feature a snap-lock feature that requires no tools. When assembling pipes into rows, note that the black geo-textile fabric does not go under couplings. Pull fabric back, install coupling, and then pull fabric over coupling. Also note, during installation in cold weather, couplings are easier to work with if stored in a heated location (such as a truck cab) before use.
2. Pipe Length Adjustments
It is easier if row lengths are designed in exact 10 ft increments since Presby Pipe comes in 10 ft sections. However, if necessary, the pipe is easily cut to any length to meet site constraints.
3. Proper Placement of Bio-Accelerator® Fabric (for Advanced Enviro-Septic® Systems Only)
The Bio-Accelerator® white geo-textile fabric for Advanced Enviro-Septic® pipes is to be positioned centered along the bottom of the pipe rows (sewn seam up).
4. Level Pipe Installation
Use a laser level or transit to install rows level. Variations beyond 1 in. (±1/2″) may affect system performance and are not acceptable.
5. System Sand
The System Sand that surrounds the Advanced Enviro-Septic® pipes is an essential component of the system. It is critical that the correct type and amount of System Sand is used during construction. System Sand must be coarse to very coarse, clean, granular sand, free of organic matter. System Sand is placed a minimum of 6 in. in all directions from the Advanced Enviro-Septic® pipes (below pipes, between rows, above pipes and around outer perimeter). It must adhere to all of the following percentage and quality restrictions:
ASTM C-33 (concrete sand), natural or manufactured sand, with not more than 3% passing the #200 sieve (verified by washing the sample per the requirements of ASTM C-117 as noted in the ASTM C-33 specification) may be used as an acceptable alternate material for use as System Sand.
System Sand may be used to keep pipe in place while covering, but simple tools may also be constructed for this purpose. Two examples are shown. One is made from rebar, the other from wood. Center-to-center row spacing may be larger than specified by this manual. Caution: Remove all tools used as row spacers before final covering.
6. Offset Adapter Installation
An offset adapter is a plastic fitting 12 in. in diameter with an inlet hole designed to accept a 4-inch sewer line, raised connection or vent pipe. The hole is to be installed in the 12 o’clock position. The distance from the bottom of the Offset Adapter to the bottom of its inlet hole is 7 in. When assembling pipes into rows, note that the geo-textile fabrics are placed over the edges of the Offset Adapter and Couplings.
A double offset adapter is a plastic fitting 12 in. in diameter with two 4 in. holes designed to accept a 4 in. inlet pipe, raised connection, vent or vent manifold, and/or bottom drain, depending upon the particular requirements of the design configuration. The 4 in. holes are to be aligned in the 12 o’clock and 6 o’clock positions. The holes are positioned 1 in. from the outside edge of the double offset adaptor and 2 in. from each other.
7. Raised Connection Installation
A raised connection is a PVC Sewer & Drain pipe configuration which is used to connect Presby Rows. Raised connections extend 2 in. to 4 in. into pipe and are installed on an angle. All PVC joints should be glued or mechanically fastened.
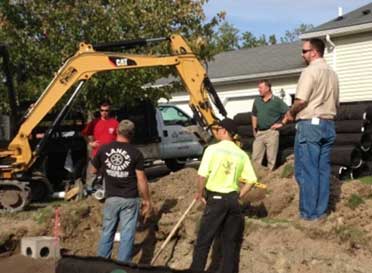
HOW TO: EnviroFin® Septic System Installation Video Series
Click on the tabs below to video each step of the EnviroFin® installation process.